How to Use Glass L Clamp for Perfect Glass Installation in 2025
In 2025, the glass installation industry continues to evolve, with innovations in tools and techniques enhancing efficiency and precision. The Glass L Clamp has emerged as a critical tool in ensuring that glass panels are installed flawlessly, reducing the risk of damage and promoting structural integrity. According to a recent report by the Global Glass Market Association, the demand for advanced installation tools has increased by 15% over the past year, underscoring the importance of utilizing high-quality equipment like the Glass L Clamp for professional results.
Industry expert Dr. Emily Hart, a leading figure in glass technology, emphasizes the significance of proper installation methods, stating, "Utilizing the Glass L Clamp not only enhances the accuracy of positioning but also minimizes the likelihood of costly errors during the installation process." As the industry adapts to new standards and expectations, understanding how to effectively use the Glass L Clamp becomes essential for contractors and installers aiming to deliver superior results. This guide will explore best practices for employing Glass L Clamps to ensure optimal performance in glass installation projects.
Understanding the Functionality of Glass L Clamps for Installation
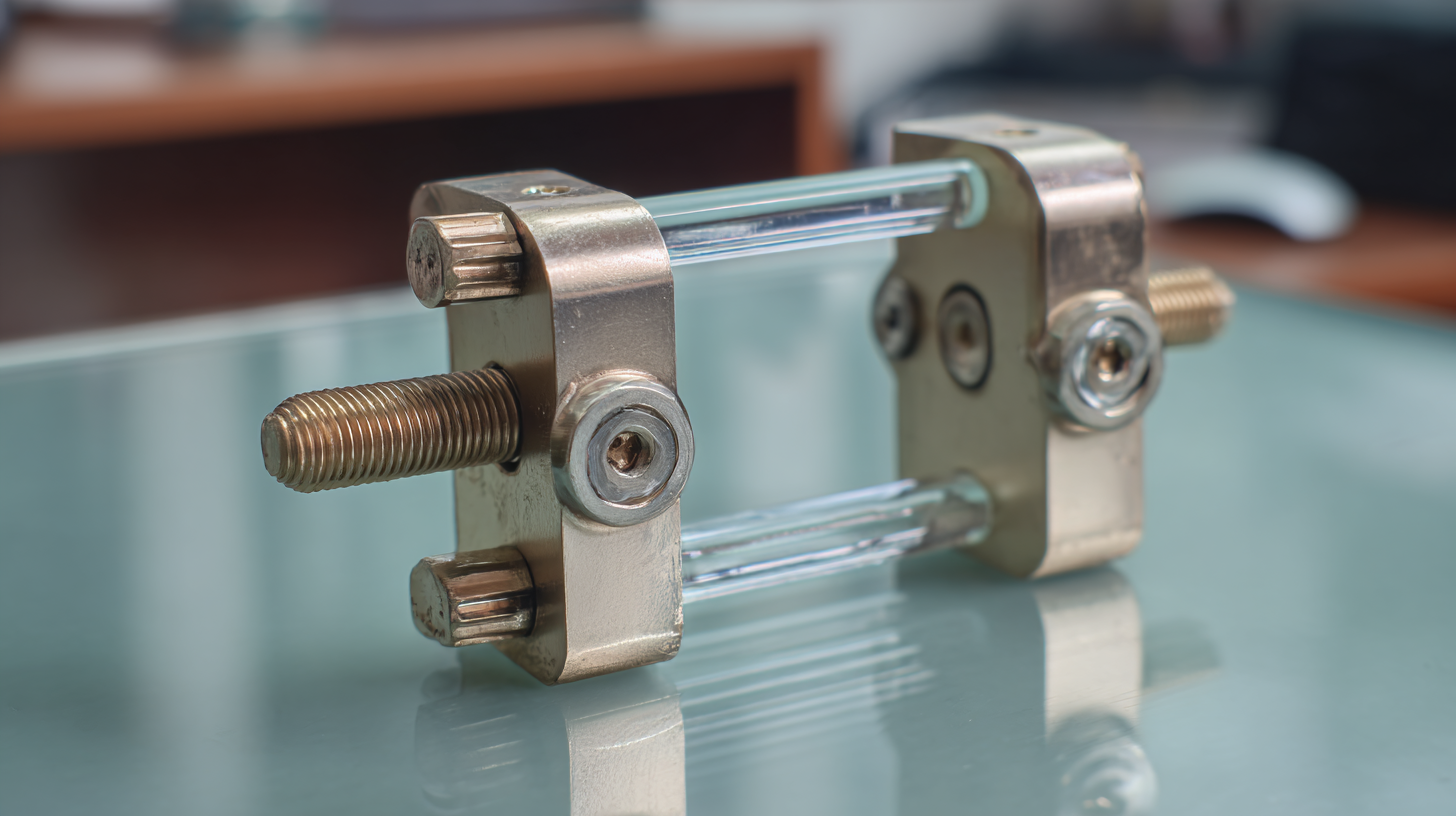
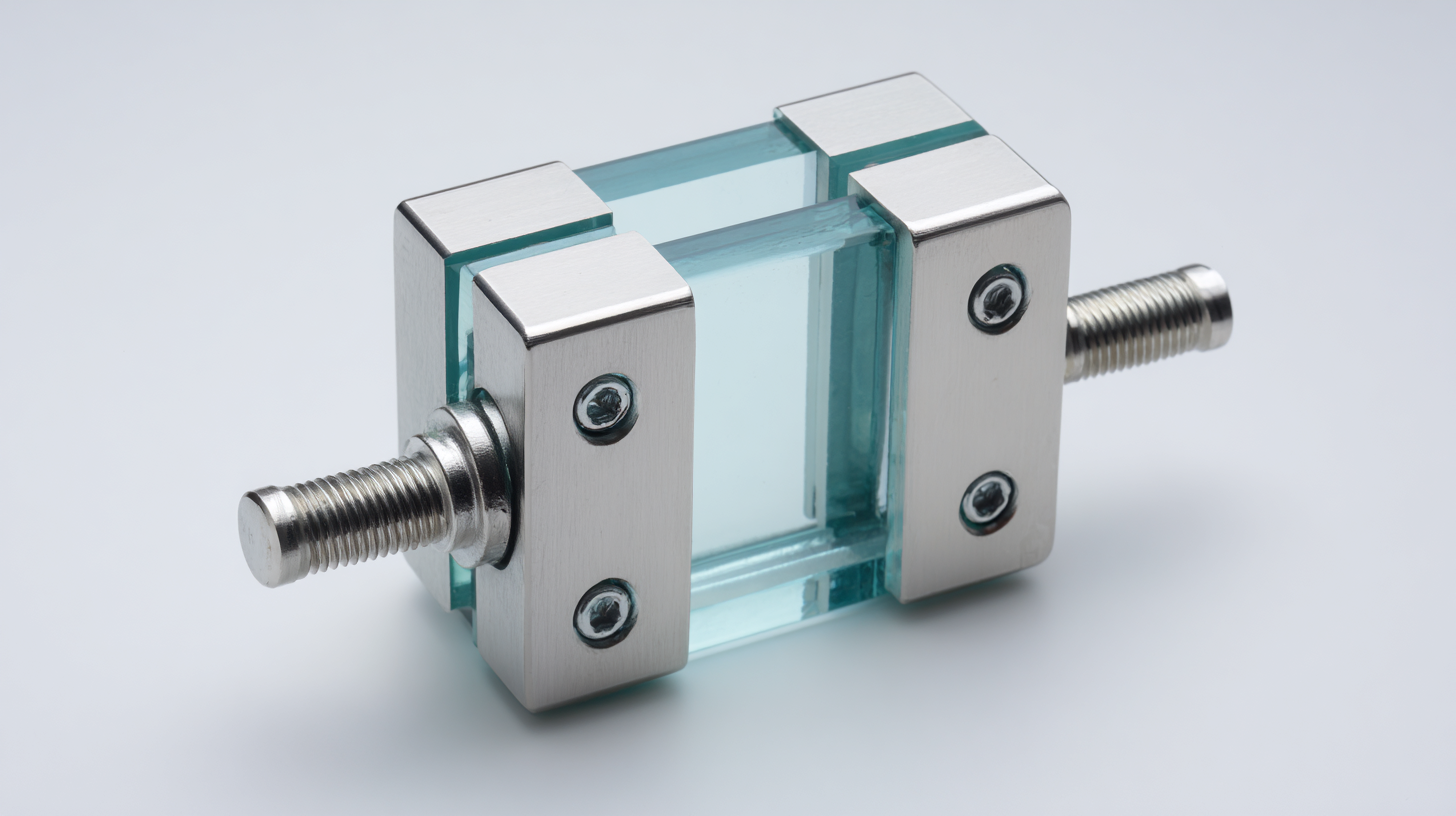
Glass L clamps are essential tools used in the installation of glass panels, providing stability and support during the process. These clamps work by firmly gripping the glass edges while securing it in place against the wall or frame. Their L-shaped design allows for optimal alignment, ensuring that the glass is perfectly positioned and reducing the risk of breakage or misalignment. By distributing pressure evenly across the glass, L clamps minimize the stress that can lead to cracks, making them a reliable choice for both professional installers and DIY enthusiasts.
Understanding the functionality of glass L clamps is crucial for achieving a flawless installation. When using these clamps, it is important to select the right size for the glass thickness to ensure they fit securely without damaging the material. The installation process typically involves placing the clamp at strategic points to provide adequate support while allowing for the necessary expansion and contraction of the glass. This knowledge not only enhances the durability of the installation but also significantly improves the aesthetic appeal, as properly installed glass creates a seamless look in any environment.
Key Factors to Consider Before Using Glass L Clamps
When using Glass L Clamps for glass installation, considering key factors can significantly influence the outcome.
The integrity of glass installations relies on factors like glass thickness, weight distribution, and environmental conditions.
Before proceeding with installation, ensure the glass panels meet the recommended specifications for L Clamps, as inadequate thickness can compromise the overall structure's durability.
Tips:
Always consult manufacturer guidelines to verify compatibility between the glass and L clamps.
Additionally, assess the installation environment for potential stressors such as wind loads or temperature changes, which can impact the glass’s performance over time.
Maintaining precise measurements and using quality materials ensures the safety and aesthetics of the installation.
Another crucial aspect is the proper placement of the clamps.
Positioning them too close to the edges can lead to breakage, while too far can cause instability.
Consider the architectural design—like the complex curved storefront recently showcased, where bespoke structural glass demands careful attention during installation.
Proper planning and execution are essential for achieving a flawless finish with Glass L Clamps.
Step-by-Step Guide to Properly Using Glass L Clamps
When installing glass elements in 2025, utilizing a glass L clamp can significantly enhance the precision and stability of the installation process. This step-by-step guide will illuminate the proper technique for using these clamps effectively. Begin by ensuring that the working surface is clean and free from debris, which can interfere with the adhesion and placement of the glass. Next, position the glass panels in their intended locations, and use the L clamps to secure them against the support structure. It is crucial to adjust the clamps gently to prevent any undue stress on the glass while achieving a snug fit.
After securing the panels, double-check the alignment before finalizing the installation. It is advisable to use a level to ensure that the glass is plumb and aligned correctly. Once satisfied with the positioning, you can proceed with the application of sealants or adhesives, carefully following the manufacturer's instructions for curing times and techniques. By embracing these systematic steps, users can achieve a flawless glass installation, benefitting from the stability and support that glass L clamps provide throughout the process.
Common Mistakes to Avoid When Installing Glass with L Clamps
When installing glass using L clamps, avoiding common mistakes can significantly enhance the quality of your installation. One prevalent error is not ensuring the glass is perfectly level before tightening the clamps. If the glass is off-center, it may lead to uneven pressure, resulting in cracks or even breakage. Always check that the surface you are working on is level and use a spirit level if necessary. This practice ensures that the glass fits securely and maintains its integrity over time.
Another mistake to watch out for is over-tightening the clamps. While it may seem logical to tighten them as much as possible for a secure hold, excessive pressure can cause stress on the glass. This can lead to fractures or permanent damage. Instead, tighten the clamps just enough to hold the glass firmly in place while allowing for slight movement. This balance between security and flexibility is crucial to a successful glass installation. Always remember to conduct a final inspection to ensure everything is aligned and secure before completing the project.
Common Mistakes in Glass Installation with L Clamps in 2025
Maintenance and Care Tips for Your Glass L Clamps
To ensure your Glass L Clamps remain in optimal condition for perfect glass installations, regular maintenance is essential. Start by cleaning the clamps after each use. Use a soft, non-abrasive cloth to wipe off any dust or adhesive residue. Avoid harsh chemicals that could degrade the clamp's materials. It’s advisable to inspect the rubber pads periodically, as these provide grip and prevent glass damage. If you notice any wear or tearing, replace them promptly to maintain the effectiveness of the clamps.
Additionally, proper storage of your Glass L Clamps can extend their lifespan. Keep them in a dry, cool place, away from direct sunlight and extreme temperatures. This helps prevent warping or degradation of materials. When not in use, store the clamps in a protective case or on a shelf to avoid unintentional impacts or scratches. By following these maintenance and care tips, you can ensure your Glass L Clamps are always ready for your next installation project, resulting in flawless glass work every time.
How to Use Glass L Clamp for Perfect Glass Installation in 2025 - Maintenance and Care Tips for Your Glass L Clamps
| Dimension |
Specification |
Usage Tips |
Maintenance Tips |
| Length |
10 inches |
Ensure proper alignment before tightening |
Clean regularly to remove dirt and debris |
| Material |
Aluminum Alloy |
Use protective pads to avoid scratches on glass |
Inspect for any signs of wear or damage |
| Weight Capacity |
100 lbs (45 kg) |
Check weight limits before usage |
Lubricate moving parts to ensure smooth operation |
| Grip Type |
Rubberized Grip |
Use consistent pressure for best grip |
Store in a dry place to prevent rust |